
A leaking pipe can quickly turn from a minor nuisance into a major headache for any homeowner. Whether it's a slow drip under the sink or a more serious leak behind a wall, the potential for water damage, mould growth, and expensive repairs makes prompt action essential. The good news is that many common pipe leaks can be fixed safely at home with the right preparation and technique. This guide walks you through everything you need to know to tackle leaking pipes confidently, from gathering your tools to completing the repair and preventing future problems.
Table of Contents
- Key takeaways
- What you need before fixing a leaking pipe
- Step-by-step guide to fixing common leaking pipes
- Troubleshooting and common mistakes to avoid when fixing leaks
- How to check your repair and prevent future leaks
- Get professional help with leaking pipes from 777plumber
- How to fix a leaking pipe FAQ
Key Takeaways
| Point | Details |
|---|---|
| Immediate action | Taking prompt action when a leak is detected helps prevent further water damage and reduces the risk of mould and costly repairs. |
| Tools and materials ready | Gather the essential tools and replacement materials before you start to save time and avoid searching for items mid repair. |
| Step by step guide | Follow a clear sequential approach to fix common leaks safely and effectively. |
| Know when to call | For complex leaks or mains supply problems, seek professional assessment before attempting DIY repairs. |
| Post repair checks | Test and inspect the repaired area to confirm the leak is fixed and no new issues have arisen. |
What you need before fixing a leaking pipe
Proper preparation is half the battle when fixing a leaking pipe. Having the right tools and materials is essential to effectively repair leaking pipes, and gathering everything beforehand saves time and frustration during the repair process.
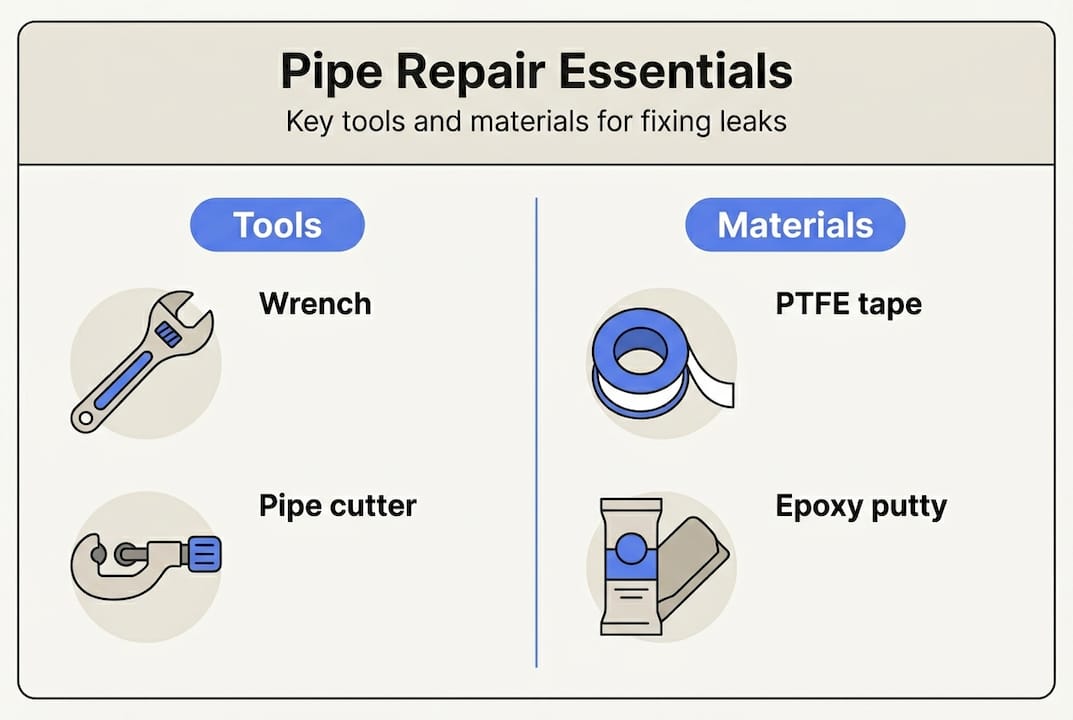
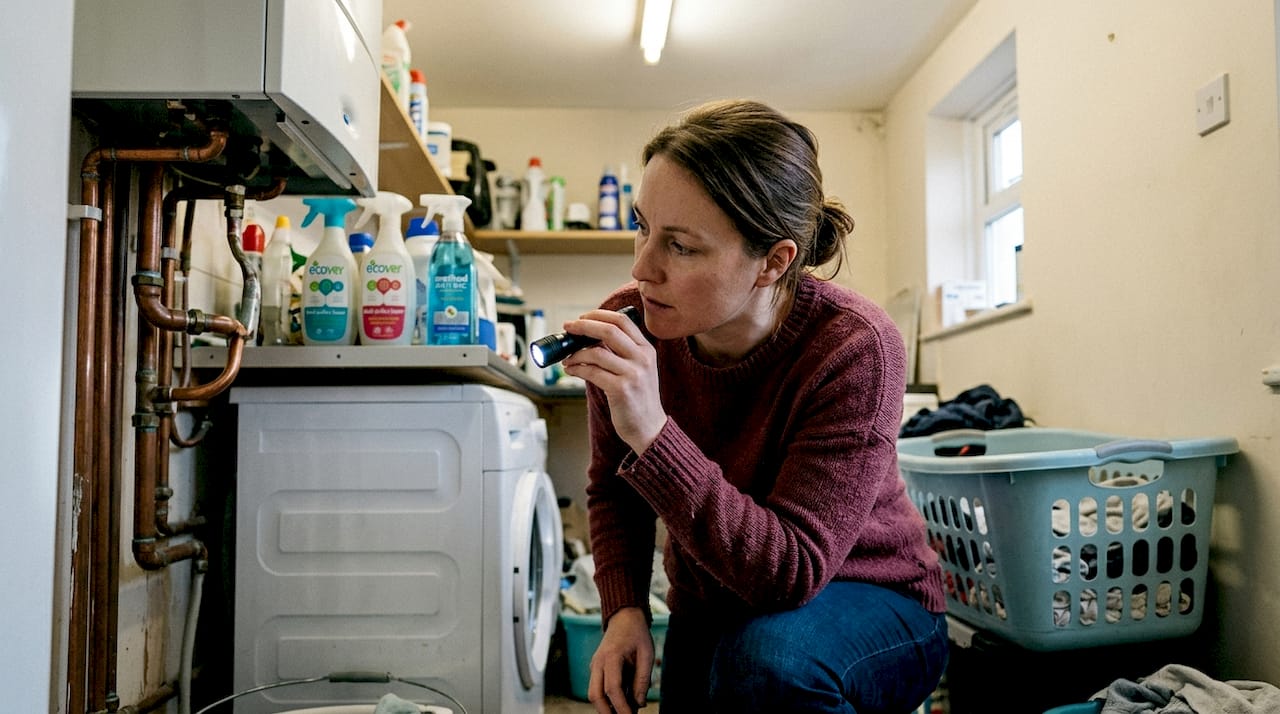
Start by assembling your essential tools. You'll need an adjustable wrench for tightening fittings, a pipe cutter if replacement sections are required, PTFE sealing tape for threaded connections, and epoxy putty for sealing small cracks. Keep a bucket handy to catch water, and always wear protective gloves to prevent contamination and injury. A torch can be invaluable for inspecting dark spaces under sinks or behind appliances.
Your materials list depends on the leak type and severity. Stock up on replacement pipe sections or fittings that match your existing plumbing, pipe repair clamps for temporary or permanent fixes on larger cracks, and either plumbing solder for copper pipes or specialist adhesive for plastic systems. Having extra PTFE tape and epoxy putty ensures you won't run short mid-repair.
Safety must come first. Always turn off the water supply to the affected area using the isolation valve or stopcock. Drain the pipes by opening taps at the lowest point to release remaining water and reduce pressure. This prevents unexpected flooding when you disconnect fittings. Wear gloves throughout to protect against bacteria in stagnant water and sharp edges on cut pipes.
| Tool or material | Purpose | When to use |
|---|---|---|
| Adjustable wrench | Tighten or loosen pipe fittings | All connection work |
| Pipe cutter | Create clean cuts for replacement sections | When replacing damaged pipe |
| PTFE sealing tape | Seal threaded connections | Joints and fittings |
| Epoxy putty | Seal small cracks and holes | Minor leaks in pipe body |
| Pipe repair clamp | Secure temporary or permanent seal | Larger cracks or splits |
| Bucket and towels | Catch water and clean up | Throughout repair process |
Pro Tip: Organise all your tools on a tray or in a toolbox near the work area before starting. This simple step prevents frustrating searches for misplaced items and reduces the risk of needing emergency trips to the hardware store when you're halfway through the repair.
For complex issues involving mains water leaks, professional assessment may be necessary before attempting DIY repairs.
Step-by-step guide to fixing common leaking pipes
With your tools ready and safety measures in place, you can now tackle the repair itself. Many leaking pipes can be repaired by homeowners using straightforward steps to prevent further damage, and following this systematic approach ensures the best results.
-
Turn off the water supply to the affected area using the nearest isolation valve or your home's main stopcock. This critical first step prevents flooding and allows you to work safely on the damaged pipe.
-
Drain and dry the pipe section around the leak by opening taps downstream and using towels to absorb remaining moisture. A completely dry surface is essential for adhesives and sealants to bond properly.
-
Identify the leak type by careful inspection. Small cracks or pinhole leaks appear as hairline splits in the pipe body. Joint leaks occur where two sections connect and often result from worn washers or loose fittings. Fitting failures involve damaged threaded connections or compression joints.
-
For small cracks or pinhole leaks, apply epoxy putty according to the manufacturer's instructions. Knead the putty until uniformly coloured, then press it firmly over the damaged area, extending at least 25mm beyond the leak on all sides. Smooth the surface to ensure complete coverage and eliminate air pockets.
-
Replace faulty joints by unscrewing the connection with your adjustable wrench and examining the washer or seal inside. If worn or damaged, fit a new washer and apply fresh PTFE tape to threaded sections before reassembling. For larger damage, use pipe repair clamps by positioning the rubber gasket over the leak and tightening the metal clamp securely around the pipe.
-
Reassemble all connections carefully, ensuring threads engage properly and fittings sit squarely. Restore the water supply gradually, opening the valve slowly while watching for any signs of leakage. Check all repair points thoroughly as pressure builds.
Pro Tip: Allow epoxy putty to cure completely before turning the water back on, even if the manufacturer suggests a shorter minimum time. Waiting the full recommended period, often 24 hours, ensures maximum strength and prevents repair failure.
If you're uncomfortable with any step or the leak persists after your repair attempt, contacting a qualified plumber in Bristol ensures the job is completed safely and correctly.
Troubleshooting and common mistakes to avoid when fixing leaks
Even with careful preparation, repairs can sometimes go wrong. Understanding common mistakes and how to troubleshoot problems helps you identify issues early and decide when professional help is needed.
The most frequent errors include failing to shut off the water supply completely, resulting in continued flow that prevents proper drying and bonding. Poor sealing technique, such as insufficient PTFE tape wraps or incomplete epoxy coverage, leaves gaps where water can escape. Using incorrect materials for your pipe type, like applying copper solder to plastic pipes or using excessive force that cracks fittings, creates new problems. Incorrect repairs can worsen leaks and increase damage, sometimes requiring costly professional fixes.
Insufficient curing time is another common pitfall. Rushing to restore water before adhesives fully set compromises bond strength and leads to immediate or delayed failure. Always follow manufacturer timing recommendations as minimum requirements, not targets.
Signs that your repair has failed include a continuing drip from the repair site, dampness or water stains appearing nearby, or noticeable water pressure loss throughout your home. Any of these indicators requires immediate attention to prevent escalating damage.
Troubleshooting tips to verify repair success:
- Check the repair site visually under good lighting for any moisture or drips
- Feel around the area with dry hands to detect dampness not visible to the eye
- Monitor water pressure at taps furthest from the repair to confirm system integrity
- Inspect the area below the repair for any water pooling or ceiling stains
- Listen carefully for hissing sounds that indicate pressurised water escaping
If leaks persist despite your best efforts, or if you notice water damage spreading, turn off the water supply immediately and contact a professional plumber. Continuing water exposure risks serious structural damage, electrical hazards, and toxic mould growth that can affect your family's health and require extensive remediation.
For persistent problems or leaks in hard-to-reach locations, a plumber in Lockleaze can provide expert diagnosis and permanent solutions.
How to check your repair and prevent future leaks
Completing the physical repair is only part of the job. Thorough verification and ongoing maintenance ensure your fix lasts and help you catch future problems before they become emergencies.
Monitor the repair site closely for 24 to 48 hours after restoring water supply. Check morning and evening, as leaks sometimes appear only after pressure cycles or temperature changes. Look for moisture, discolouration, or any drips that weren't present immediately after the repair.
Test your water pressure at multiple taps throughout your home. Reduced pressure can indicate a hidden leak or incomplete seal somewhere in the system. If pressure seems lower than before the repair, investigate further or consult a professional.
Establish simple inspection routines to catch early signs of wear before they become leaks:
- Examine visible pipes monthly for corrosion, discolouration, or moisture accumulation
- Check under sinks and behind appliances quarterly for dampness or water stains
- Monitor your water meter when no water is being used to detect hidden leaks
- Inspect pipe joints and connections for any signs of deterioration or loosening
- Test water pressure regularly to identify gradual drops that suggest developing problems
Regular checks and maintenance significantly reduce the risk of future leaking pipes and water damage. Catching small issues early prevents major repairs and protects your home's structure and value.
| Maintenance approach | DIY checks | Professional inspection |
|---|---|---|
| Frequency | Monthly to quarterly | Annually or biennially |
| Cost | Minimal (time only) | Service fee applies |
| Coverage | Visible pipes and accessible areas | Entire system including hidden sections |
| Detection capability | Obvious leaks and surface issues | Hidden leaks, pressure problems, system integrity |
| Best for | Ongoing monitoring and early detection | Comprehensive assessment and preventive maintenance |
Know when professional inspection or replacement is advisable. If your home has pipes older than 40 years, particularly lead or galvanised steel systems, consider a full professional assessment. Repeated leaks in the same area suggest underlying problems that DIY repairs won't solve permanently. Discoloured water, persistent low pressure, or unusual noises in your plumbing system all warrant expert evaluation.
For comprehensive guidance on maintaining your plumbing system and preventing emergencies, review our emergency plumbing repair guide.
Get professional help with leaking pipes from 777plumber
Whilst many leaking pipes can be fixed with DIY methods, some situations demand professional expertise to prevent serious damage and ensure lasting repairs. When leaks persist despite your best efforts, involve hidden pipes behind walls, or affect your main water supply, it's time to call in the experts.
777plumber offers 24hr emergency pipe repair and leak detection services across the UK, ensuring help is available whenever you need it most. Our in-house team of fully employed technicians brings consistent quality and accountability to every job, with transparent pricing and no hidden call-out fees. Whether you're dealing with a stubborn leak, need comprehensive system inspection, or require urgent repairs to prevent water damage, we're here to help.

Homeowners throughout Bristol and surrounding areas can rely on our local expertise and rapid response times. Our plumber in Bristol and plumber in Fishponds services ensure you have trusted professionals nearby when emergencies strike. For complex issues involving your main water supply, our specialist mains water leak detection service uses advanced technology to locate hidden leaks quickly and accurately, minimising disruption and damage to your property.
How to fix a leaking pipe FAQ
How long can I delay fixing a leaking pipe?
You should never delay fixing a leaking pipe, as even small leaks cause progressive water damage, mould growth, and structural deterioration. What starts as a minor drip can quickly escalate into major repairs costing thousands of pounds. Address leaks immediately to protect your home and prevent escalating problems.
Can I use household tape as a permanent fix?
Household tape is never suitable as a permanent fix for leaking pipes, though PTFE plumbing tape works well for threaded connections when applied correctly. Standard adhesive tape lacks the durability and water resistance needed for plumbing repairs. Use proper plumbing materials like epoxy putty, pipe repair clamps, or replacement fittings for lasting results.
What are signs I must call a plumber urgently?
Call a plumber immediately if you cannot locate the leak source, if water is spraying forcefully, if the leak involves your main water supply, or if water is pooling near electrical systems. Multiple simultaneous leaks, discoloured or foul-smelling water, or leaks that persist after attempted repairs also require urgent professional attention.
Is it safe to fix a leaking pipe myself?
Fixing simple leaking pipes yourself is safe when you follow proper procedures, turn off the water supply, and use appropriate tools and materials. However, leaks involving gas pipes, main water lines, or pipes behind walls require professional expertise. If you're uncertain about any aspect of the repair or uncomfortable working with plumbing, contact a qualified plumber.
How often should I inspect my pipes for leaks?
Inspect visible pipes monthly for early signs of problems, and conduct more thorough checks of under-sink areas and behind appliances quarterly. Annual professional inspections provide comprehensive assessment of your entire plumbing system, including hidden pipes. Homes with older plumbing or previous leak history benefit from more frequent professional evaluation.