TL;DR:
- Many common pipe leaks are repairable by capable homeowners with proper tools and safety measures.
- DIY repairs are best for small, accessible leaks; complex or hidden issues require professional help.
- Regular inspection and insulation of pipes help prevent future leaks and damage.
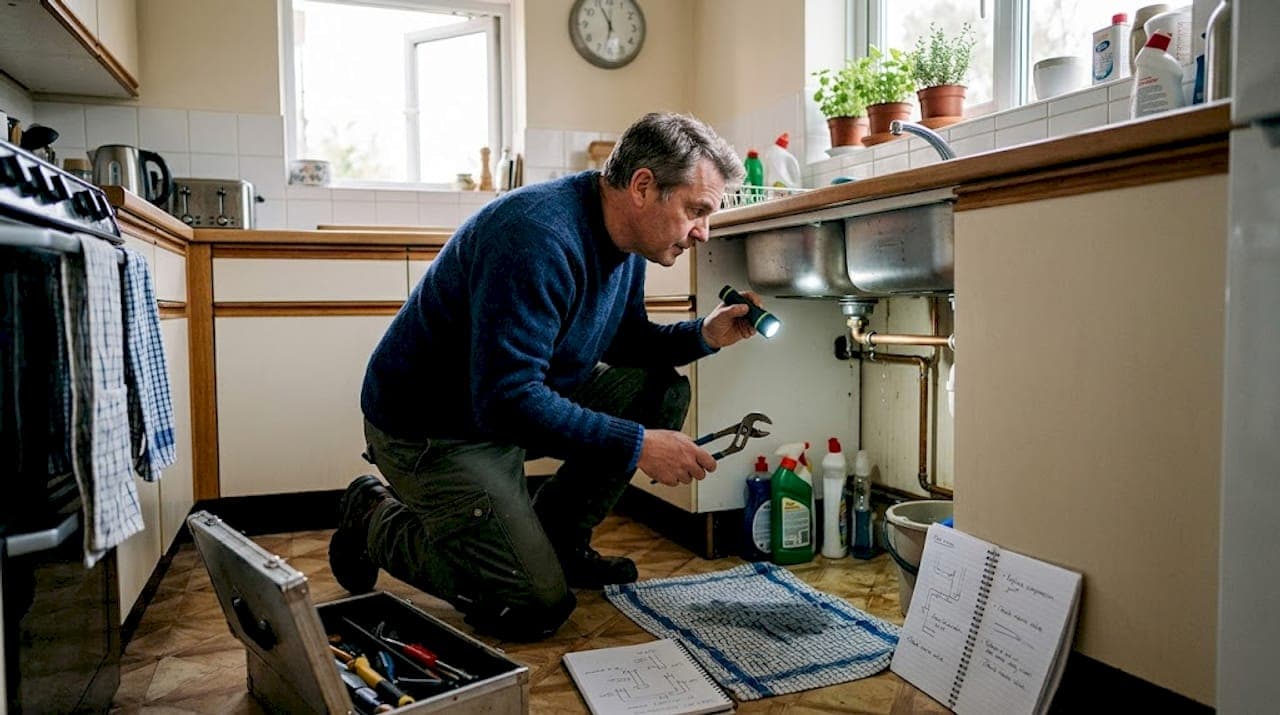
That drip under the sink. The damp patch spreading across your kitchen wall. Discovering a leaking pipe is one of those moments that makes your stomach drop. The good news is that many common pipe leaks are well within reach of a capable homeowner armed with the right tools and a clear plan. Acting quickly is what separates a minor inconvenience from a costly flood. This guide walks you through everything you need to know: from identifying the problem and gathering your equipment, to carrying out a proper repair on both copper and plastic pipes, testing your work, and making sure it never happens again.
Table of Contents
- Preparing for pipe repair: What you need and safety first
- Step 1: Diagnosing your pipe problem
- Step 2: Fixing leaks in copper pipes
- Step 3: Fixing leaks in plastic (PVC) pipes
- Finishing the job: Testing and prevention tips
- Our perspective: When DIY makes sense and when to call in the pros
- Need help with a pipe you can't fix? Call in a trusted local plumber
- Frequently asked questions
Key Takeaways
| Point | Details |
|---|---|
| Safety is crucial | Always isolate the water supply and check for electrical/gas risks before starting any DIY pipe repair. |
| Match the fix to the pipe | Use clamps or putty for temporary sealing, but plan a full replacement for a lasting solution. |
| Copper and PVC differ | Copper pipes require cutting and couplings, while plastic pipes often use solvent cement or push-fit fittings. |
| Know your limits | Call a professional for bursts, mains, hidden leaks, or any situation where safety is at risk. |
| Prevent future leaks | Regular checks and using WRAS-approved parts reduce the chances of leaks coming back. |
Preparing for pipe repair: What you need and safety first
Before you touch a single fitting, preparation is everything. Skipping this stage is how small leaks become major disasters. The universal first steps for any pipe repair are to turn off the water supply at the stopcock or isolation valve, drain the system by opening taps, and dry the area thoroughly before you begin.
Start by gathering your personal protective equipment (PPE). You will want:
- Safety goggles to protect from debris and chemical splash
- Rubber gloves when handling epoxy or solvent cement
- Old towels and a bucket to catch residual water
- Knee pads if you are working under a sink or in a tight space
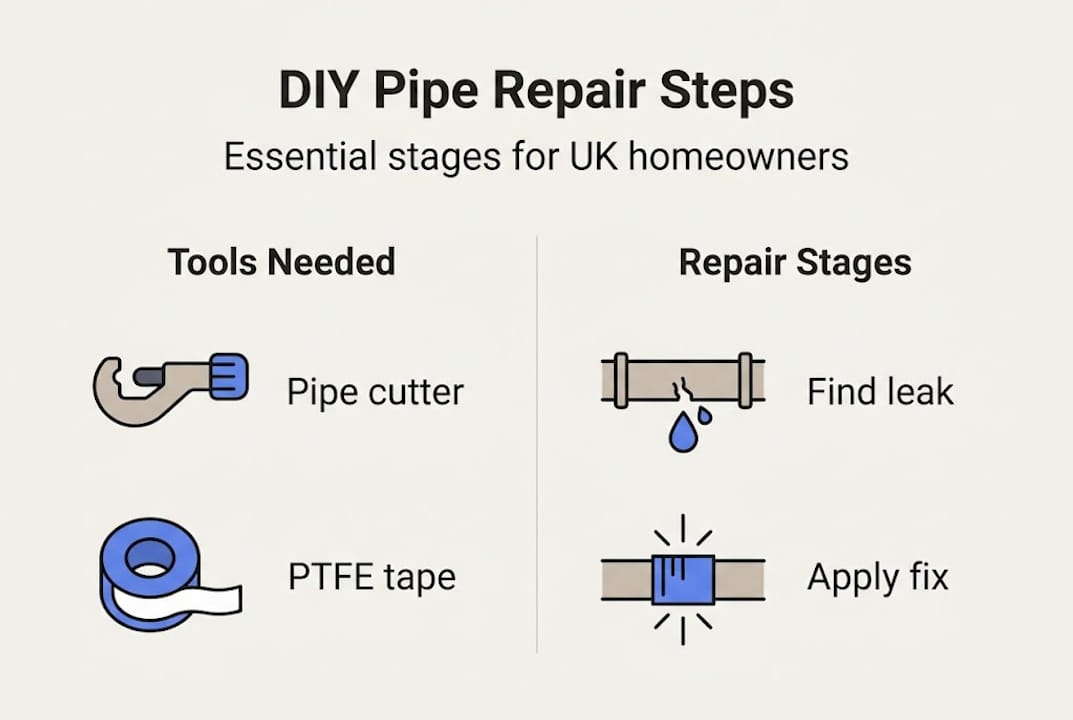
Here is a quick overview of the tools and materials you are likely to need, depending on your pipe type:
| Tool or material | What it does | Copper pipes | Plastic/PVC pipes |
|---|---|---|---|
| Pipe cutter | Makes clean, square cuts | Yes | Yes |
| Adjustable wrench | Tightens compression fittings | Yes | Rarely |
| Deburring tool | Smooths cut edges | Yes | Yes |
| PTFE tape | Seals threaded joints | Yes | Yes |
| Epoxy putty | Temporary crack seal | Yes | Yes |
| Compression coupling | Permanent copper joint | Yes | No |
| Push-fit fitting | Fast, tool-free joint | Sometimes | Yes |
| Solvent cement | Permanent PVC bond | No | Yes |
For further leaking pipe repair tips and a broader list of materials, it is worth checking a dedicated plumbing resource before you shop.
Critical note: If the leaking pipe is near gas pipework or electrical wiring, do not attempt a DIY repair. Shut off the relevant supply immediately and contact a qualified professional. This is non-negotiable.
If you are struggling to locate where the water is coming from, our guide on spotting pipe leaks in UK homes can help you narrow it down before you begin.
Step 1: Diagnosing your pipe problem
Once you have rounded up your tools and taken safety measures, the next big step is understanding what you are dealing with. Not all leaks are equal, and the right repair method depends entirely on your pipe material and the nature of the damage.
Follow these steps to assess the situation:
- Identify the pipe material. Copper pipes are hard, shiny, and orange-brown in colour. Plastic pipes are lighter, often grey or white, and feel slightly flexible.
- Locate the exact leak point. Dry the pipe completely and watch closely for where water first appears. Is it a joint, a hairline crack, or a pinhole?
- Assess the severity. Is it a slow drip or an active spray? A dripping joint is manageable as a DIY task. A spray suggests pressure and more serious damage.
- Check accessibility. Can you reach the pipe comfortably? Pipes behind walls or under concrete floors are not DIY territory.
- Decide on DIY or professional help. Small, visible leaks in accessible joints are suitable for DIY; mains pipes, hidden leaks, burst pipes, or situations where you are simply unsure require a professional, in line with UK Water Regulations.
For a broader look at what different faults involve, our overview of types of plumbing repairs for UK homeowners is a useful reference.
Also, take a look at this practical guide on identifying pipe leaks for more detail on diagnosing the source before committing to a fix.
Pro Tip: If water appears at multiple points when you run a tap, you may have a pressure issue rather than a single leak. This is a sign to call a professional rather than chase individual drips.
Temporary fixes can absolutely buy you time, but they are not permanent solutions. That distinction matters, and we will cover both approaches in the next two sections.
Step 2: Fixing leaks in copper pipes
Once you know your pipe is copper, here is how to handle both urgent fixes and lasting repairs. Copper is robust and durable, but it is vulnerable to pinhole corrosion and joint failure over time.
Temporary repair steps:
- Dry the pipe surface completely with a cloth or heat gun on low.
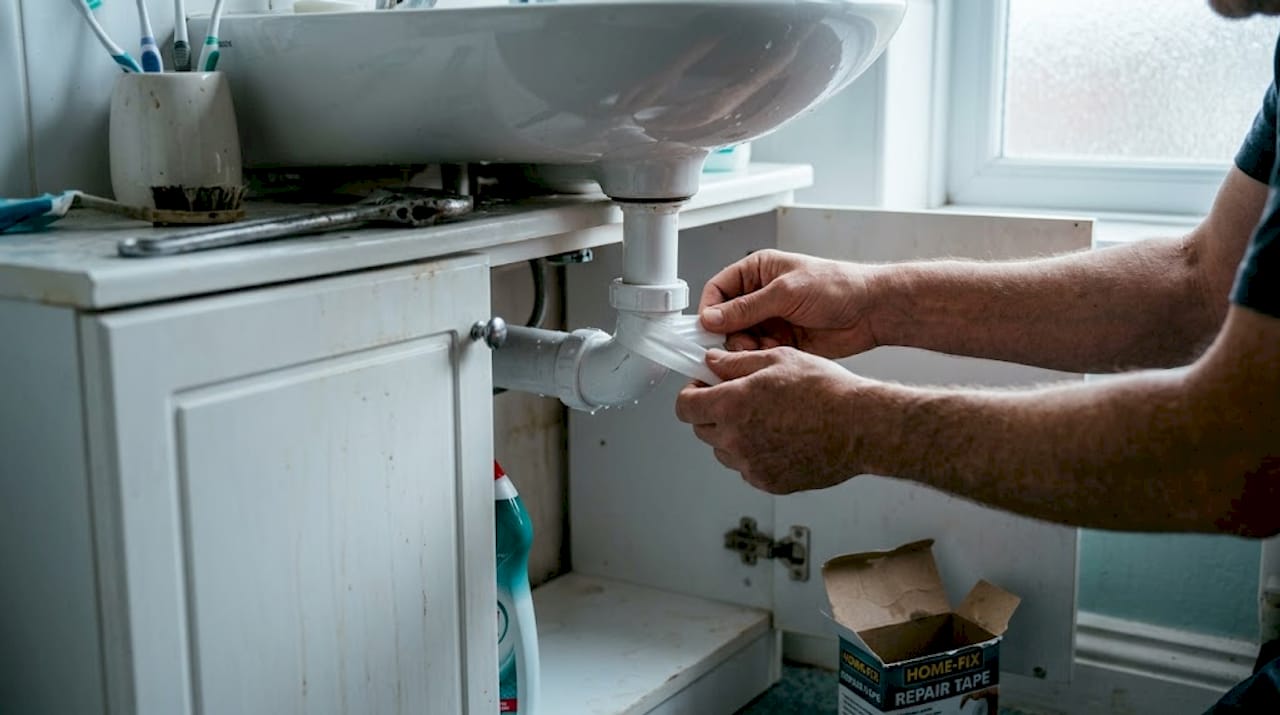
- Apply a pipe clamp or repair tape firmly over the damaged area, following the manufacturer's instructions.
- For cracks, knead epoxy putty until it is a uniform colour and press it firmly into and around the leak. Hold it in place for two to three minutes.
- Allow the full curing time before turning water back on.
Permanent repair steps:
- Turn off the water and drain fully.
- Use a pipe cutter to remove the damaged section. A copper pipe cutter gives a far cleaner cut than a hacksaw.
- Deburr both cut ends using a deburring tool or fine sandpaper.
- Slide on compression couplings or push-fit slip fittings to bridge the gap with a new pipe section.
- Tighten compression fittings firmly but do not overtighten. Two finger-turns past hand-tight is usually correct.
- Turn water on gradually and check for leaks before declaring the job done.
Avoid soldering unless you have prior experience. A poorly soldered joint can fail weeks later, sometimes inside a wall. Our article on DIY pipe leak repair goes into further detail on when solder is and is not appropriate.
Pro Tip: Always rotate the pipe cutter slowly and tighten the wheel a little with each revolution. This keeps the cut perfectly square, which is essential for a leak-free compression fitting.
Step 3: Fixing leaks in plastic (PVC) pipes
If your problem pipe is plastic or PVC, the repair process changes a little. Plastic pipes are most common in waste, drainage, and soil stacks in UK homes, and they respond well to DIY repair when you follow the right method.
Temporary fixes:
- Dry the pipe surface thoroughly.
- Press epoxy putty around the damaged area as described for copper, or use a pipe repair clamp sized for plastic.
- These temporary measures hold well for low-pressure waste pipes but are not suitable for pressurised supply lines.
Permanent repair steps:
- Cut out the damaged section using a pipe cutter or fine-tooth saw, ensuring a perfectly square cut.
- Chamfer the cut edges lightly with sandpaper to remove any burrs.
- For a solvent weld joint: clean both surfaces with solvent cleaner, apply solvent cement to both the pipe end and the inside of the fitting, push together with a slight twist, and hold for 30 seconds. Assembly must be fast as the cement sets quickly.
- For a push-fit fitting: simply push the prepared pipe end into the fitting until it clicks. Test with a gentle pull.
For further guidance on specific drainage issues, this resource on external downpipe repairs is particularly helpful.
| Application | Solvent weld | Push-fit | Prohibited near |
|---|---|---|---|
| Cold waste pipes | Yes | Yes | Not applicable |
| Rainwater/drainage | Yes | Yes | Not applicable |
| Hot water feed | No | Check rating | Boiler, within 1 metre |
| Pressurised supply | No | Check rating | Heat sources |
Never use solvent cement within one metre of a boiler or hot water feed. For problems that keep recurring, our guide to common plumbing problems is worth reading.
Finishing the job: Testing and prevention tips
With your repair done, make sure the job is truly complete and avoid repeat incidents. Turning the water back on correctly is just as important as the repair itself.
Turn the stopcock or valve slowly. Do not open it all at once. Watch the repaired area carefully as pressure builds. Run a tap downstream to release any trapped air. Then inspect every part of the repair for:
- Weeping around compression fittings (tighten slightly if needed)
- Discolouration on surrounding materials suggesting ongoing moisture
- Hissing sounds indicating a pressurised leak
- Soft or wet insulation around the pipe
If everything looks dry after five minutes at full pressure, your repair has succeeded. If not, turn the water off again and re-examine the fitting.
For long-term prevention, follow these habits:
- Insulate exposed pipes, particularly in lofts, garages, and external walls, before winter. Our guide to preventing burst pipes explains exactly how and where.
- Check regularly for green staining on copper (early corrosion sign) or wet patches on walls. Learn more about the signs of future leaks to catch problems early.
- Use WRAS-approved parts for all repairs. WRAS (Water Regulations Advisory Scheme) approval means the part meets UK standards and will not react with other metals to cause corrosion.
For helpful guidance on working with plastic pipe, the plumbing plastic pipe tips from Plumbing Superstore are well worth bookmarking.
| Repair method | Best for | Reliability | Tools needed |
|---|---|---|---|
| Repair tape | Emergency, low pressure | Temporary | Scissors, dry cloth |
| Epoxy putty | Cracks, pinholes | Short-term | Gloves |
| Pipe clamp | Splits, small bursts | Short-term | Screwdriver |
| Compression fitting | Copper supply pipes | Permanent | Pipe cutter, wrench |
| Push-fit fitting | Plastic or copper | Permanent | Pipe cutter |
| Solvent weld | PVC waste pipes | Permanent | Cement, cleaner |
Our perspective: When DIY makes sense and when to call in the pros
We have seen a lot of well-intentioned repairs go wrong, and the pattern is almost always the same. The homeowner correctly diagnosed a small joint leak, competently applied the fix, and then convinced themselves the same approach would work for a larger problem. That is where things get expensive.
DIY pipe repair makes complete sense for small, visible leaks in accessible locations, particularly where a push-fit fitting or epoxy putty can do the job quickly and safely. Modern fittings have genuinely made this kind of repair more achievable for non-tradespeople. No soldering required. No specialist knowledge. Just patience and the right parts.
But the line is sharper than most guides admit. Burst pipes require immediate isolation and only a temporary clamp until a professional repairs them properly. Hidden leaks, mains connections, and anything near gas or electrical supplies are firmly in professional territory. The risk is not just water damage. Attempting a DIY fix near live services puts you and your home in genuine danger.
Our honest view: know your limits and respect them. A good temporary fix applied confidently is always better than a botched permanent one.
Warning: If there is any possibility of gas pipework or live electrical cables near the leak, stop immediately. Isolate the supply, leave the area, and call a qualified professional. This is not a situation for DIY.
For anything that escalates beyond your comfort zone, our resource on handling urgent pipe failures explains exactly what to do while you wait for help.
Need help with a pipe you can't fix? Call in a trusted local plumber
Some jobs are simply best left to trained hands. Whether a repair is too complex, the pipe is hidden behind a wall, or you just want the peace of mind that comes with a qualified professional, getting specialist help is always the right call.

At 777 Plumber, our fully employed team is available around the clock for expert emergency repairs, with transparent pricing and no call-out charges. We never use subcontractors, so you always know who is in your home. If you are in the Bristol area, our local Hotwells plumber and Eastfield plumber teams are ready to help with everything from a dripping joint to a full pipe replacement. Book online in minutes and get a real solution, fast.
Frequently asked questions
What is the first thing to do if I spot a leaking pipe?
Immediately turn off the water at the stopcock or isolation valve and drain the system to minimise damage.
Can I use tape or putty as a permanent solution for pipe leaks?
Tape and epoxy putty are effective short-term measures, but a lasting repair needs a proper pipe section or fitting. Temporary fixes buy time but are not a permanent solution.
How do I know if I should call a plumber instead of fixing it myself?
Call a professional if the leak is hidden, connected to the mains, is a burst pipe, or if you are uncertain. UK Water Regs support this guidance for safety.
What tools are needed for DIY pipe repair?
You will need a pipe cutter, adjustable wrench, deburring tool, PTFE tape, clamps, epoxy putty, and solvent cement for plastic pipes. A full tools checklist covers everything you need before you start.
How can I prevent pipes from leaking again in future?
Insulate exposed pipes, inspect regularly for corrosion or green staining, and always use WRAS-approved parts to avoid galvanic corrosion and ensure compliance with UK standards.